Alella the relaunch

The time had come the Walrus said
to talk of many things
of shoes and ships and sealing wax
of cabbages and kings
and why the sea is boiling hot
and whether Alella would float.


A beautiful day driving from the ferry down to West Cork in bright winter sunlight, everything was so clear and sharp. It was strange that the traffic slowed up significantly after Cork. This was slightly frustrating as we were trying to get to Turkhead in time for Dinner. We also started noticing that some of the parking was especially random, even for Ireland, as cars had been left where they had stopped often in hedgerows or ditches. It transpired that County Cork had been experiencing severe frosts with ice on the roads, as one resident said when asked about the provision of gritting services  “Yes they do grit some roads, only we don’t know which ones”.  For West Cork such weather is almost unheard of so a little unpreparedness was to be expected.

After arriving and a glass of wine for Dara and I to unwind, mothers first inspection took place. As it was dark and really freezing outside this was very brief but at least the first impressions were favourable. As I have said before, I think my mother had never really expected to see Alella back again when I took her away in July so for her this was a very unexpected but pleasant surprise.

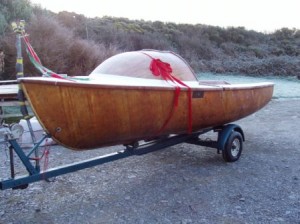
The next morning dawned very cold but with bright sunshine. The whole area was covered in frost twinkling in the morning sun. After breakfast the real inspection began, Alella was covered in frost but still looked great, a shame that the red bow looked a little droopy.


It was now time for the ultimate test, would Peggy approve of Peggy’s perch?


This was a resounding success so I could finish screwing on those items such as fairleads, block eyes and the centreboard tackle that I had run out of time for in the UK.  Alella was then pushed into the barn as other family members were due to arrive and they knew nothing about the rebuild.

Christmas eve dawned cold but clear, another fabulous winter day was in prospect. I suggested a trip over to Sherkin for lunch at the “Islanders Rest“. The others all thought I meant going in the punt not realising what was in the barn. The great surprise occurred while I was in Skibbereen getting petrol for the outboard and Ian was wondering around inspecting “the works” when he came upon Alella and not quite as he expected her either. When I got back from town I realised that my big Surprise Surprise moment had gone but everyone did seem pleased if slightly bemused.


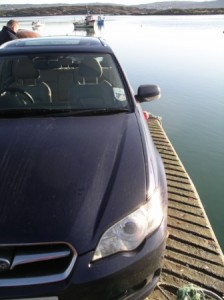
A rush to the jetty ensued with Alella in tow, disaster the tide was not over the end of the pier and falling. Now this is where the break-back trailer came into its own as we were able to safely launch over the end of the jetty using the winch. Mind not a place for the faint hearted while reversing especially as the driver can not see the edge!


Quickly Alella is launched, back into her element and ready for many more adventures.


One of the local fishermen admiring the gleaming varnish said “Its nice to see Gordon’s boat back”. That about summed up all our feelings.


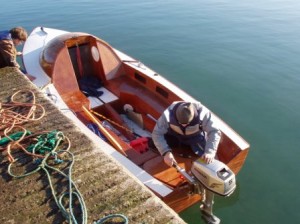
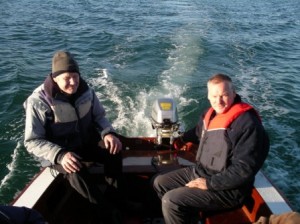
Outboard on and all aboard for Alella’s first trip, the Murphy’s could almost be tasted.


A short time later, with suitable posy pictures of everyone on board, we enjoyed lunch and a couple of glasses at the Island Rest before returning into a fabulous sunset.


The master mariners trying to look cool, not difficult in the middle of winter!


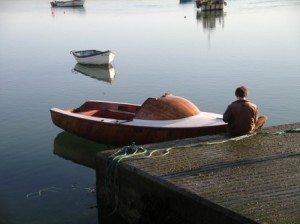
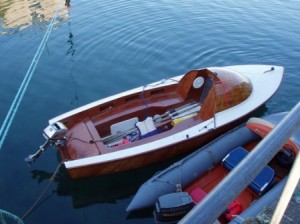
Moored off Sherkin pier, sitting peacefully.


Which way is home?

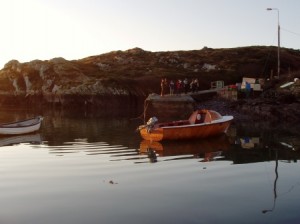
The bay was so still but the air so clear that every little detail stood out with great clarity.


Alella was moored and photographs taken before we all retired to a blazing fire and a Christmas eve feast.


Next morning the wind was howling around the cottage’s eves so I slipped out down to the jetty and recovered Alella to put her back into the dry barn. It would have been a shame to let her get damaged after all the work to this point.


♥ Apologies to Lewis Carroll for my misuse of his “The Walrus and the Carpenter”

Alella gets ready to return to Ireland

The varnishing and painting now complete it was time to think about getting the rig fitted and another million little jobs that still had to be done.

One task that did take some time was sorting the major issue I had created by not wedging the case opening in the middle of the slot. This had allowed the slot width to close in by about one millimetre on each side with the result that the centreboard would not fit. At each end it was fine, so I had to sand the area in the middle using a board with sandpaper attached to get the slot width just bigger than the plate thickness. I cursed myself more and more at how long this took but eventually it was finished and the Centreboard fitted. Epoxy and varnish protected it all. A lesson learned, don’t assume that a long section will glue up straight without clamps or support, I will not be making the same mistake again.

When considering the launching and recovery in Ireland I had decided that a break-back trailer like the one I had built for my Salcombe Yawl was needed. I was fully intending to have another new one made when I remembered that when I sold my Yawl the new owners had not really wanted the trailer as they would have the boat looked after by one of the many local boat service organisations. A quick phone call and the deal was done so after a day trip to Devon I had a new trailer. This needed minor modification to the load bearing rollers to fit Alella and was ready to go.

Now with trailer and boat complete it was time to go to P&B in Northampton. They had made some new sails and fitted out a new mast for Alella. So on a cold grey December day I travelled down to Northampton to a warm welcome from Alan Bax and his team who sorted everything so I could leave with the rig ready to go. All I had to do was drink coffee and watch. Great thanks also go to Tom who organised everything including the specification for the mast and sails. All the help was much appreciated. The ease with which I was able to set up the rig for the first time was a testament to the care taken by P&B.

The P&B sails were also a great talking point in Ireland, such as when we docked at the Sherkin Island pontoon just behind a large sailing cruiser and immediately got into conversation with the owner regarding the boats we had raced and events attended in the past.  All because he was intrigued by the sail logo on what was obviously a cruising boat.

Here I digress as there was still work to do with some touch ups to the varnish to be finished, the rudder blade being varnished and all the hatches to be bolted on…….

Well the day of return was now almost upon us so I packed Alella up for the journey. I also had to find a way to take the trailer that I had used to bring her over from Ireland back again.


This old lightweight trailer would certainly not have taken Alella now she was fully fitted out. Once packed up she certainly hid some of her elegance with all the bits and pieces lashed on.


The time had come to depart so we drove off leaving the Shifnal Christmas lights behind. I looked back over the last few months and was quietly satisfied with the results. Would I have done it again – YES, it is some time since I have worked on a project that gave such immense satisfaction.

Early the next morning, as Dara, Alella and I left Manchester aiming for the ferry in Holyhead we were greeted by a blizzard. The M62 was all white with no lane markings visible and heavy snow driving across the road. Worries about reaching the ferry on time or even worse ending up in a ditch surfaced. Luckily my trusty Suby took it all in its stride and kept up steady and safe progress, sometimes the four wheel drive does come in useful. As we passed Conway the sun came out and we enjoyed the rest of the trip along the coast to Anglesey on a bright winters morning.


Arriving at the ferry in good time, why had we worried, Alella could almost feel she was on her way back to West Cork and with non of the indignity of being craned on and off that she had had to endure back in the early 60’s.

Alella Gunwales, varnish and deck paint

The capping strips and trims seemed so insignificant but they took an inordinate amount of time to fit and router and sand to shape but at least the result looked good.

It was now time to fit the gunwales, a simple task or so I thought. It all got off to a great start with the aft ones on both sides glued and screwed in no time and very easy. Then came the bow sections. What I had thought was a gentle curve was anything but for the wood I was using. Disaster the port one cracked and broke. It was obvious that I was trying to get it too bend too much. So after carefully re-glueing the broken section together, I thought lets steam it.

A quick trip to the hire shop let me acquire a steam wallpaper stripping machine. It was easy to remove the steam plate so that the pipe could be inserted into the end of a drain pipe. A little Heath Robinson but looked like it might work. The timber was inserted and the steam started. A point of advice the plastic drain pipe goes soft so put it on the floor to stop it bending. It did a great job and the timber was much easier to bend, but even with the aid of a rope windlass at the bow it would still not bend and twist to the right shape. The only way forward was to spilt the gunwale in half and laminate it in place. I split the two pieces on the bandsaw and started the steaming again. This time success, as it all pulled up beautifully even if a lot of force from the rope windlass at the bow was still required. A little sanding and it was difficult to spot the problems that had beset this job which was a great relief. I had been worried that I might to have to source new timber.

A small capping was made for the bow, why I am not sure of because, if my memory is correct, this was the first bit that got knocked off when we as inexperienced sailors did not quite stop before hitting piers and things. Anyway it looks good to start with.


With Alella now looking pretty good, it was time for its protection. This was done with three or four coats of epoxy resin followed by four coats of two pack polyurethane varnish on the exposed woodwork. The deck areas also had a 50 gram glass cloth sheath and the deck to cabin joint some 200 gram strips of glass cloth as strengthening.  If I have to repair it I will be surprised.


At this stage my camera was suffering from the dust that had been around while I had been preparing to varnish.

As to the deck surface some form of non slip was needed. In the past I have always done this with a little sand in the paint but this is quite abrasive. One day whilst idly surfing the web I found Protecta-Kote which has rubber granules in the polyurethane paint. These give a non slip surface whilst not being abrasive and can easily be over painted. So an order was sent off and the paint was delivered promptly, great service from New Venture Products Limited check them out at http://www.protectakote.co.uk/

The most difficult part of the deck painting was the masking to prevent any splashes onto the newly varnished wooden surfaces. This took a little time as I wanted to get the edges really sharp and true. Once this was done it was time to get the roller out and get the paint on. Nearly a disaster with a drill mounted stirrer which wanted to spray the paint across the shop, a tip keep it on a very slow speed or stir it by hand. The paint was quick and easy to apply and went off well despite the cold conditions.

In use, after two seasons use, the Protecta-Kote paint has done everything I wanted, its non-slip even when wet, its been hard wearing so far, not needing any touching up and looks really great.


The result looked stunning. Alella now looked almost identical to my memories of the boat when it first went out to Ireland in the early 60’s.  I could’t wait to get her back on the water and sailing again. I got a lot of ribbing from Steve and the lads in the next door unit as to whether she would actually float, but even they were impressed now especially as they had though me totally deluded when I started on the project.

Alella more cockpit fit out

Just like at the time this bit seemed to go on and on and on….

It had all seemed so close to completion but then there always appeared another job, such as a cross beam that needed mortising or a panel that needed marking out and cutting. At least the boat now looked nearly complete and progress could be seen but would it be enough to make the cut off as the ferry had now been booked and I had committed to getting the boat back to Ireland before Christmas. As it was now mid November you can imagine how tight the schedule had become. The weather was also getting colder and the heaters in my tent were working overtime to keep everything warm enough to make progress.

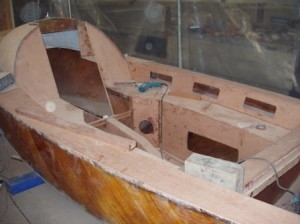
The cockpit was now coming together. The rear centreplate cross beam had been mortised into the side verticals before the tank sides were built. Pockets were also cut into the inner deck sides. This was a deviation from the original design but did provide storage for “jammy dodgers” while on passage. I also discovered that they were ideal for holding the fenders which were then always ready to be flipped out when needed.
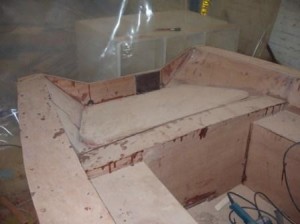
The next bit was the cabin entry sides which were to incorpate a dry storage locker. The front and bottom panels of this locker can be seen in the picture above.

The sides were marked out and cut roughly to size, then accurately marked and fitted. A backing stringer was fitted on the forward edge along with the door support for the original perspex door.

Yes, The new layout was such that the cabin opening was exactly the same size as the original. It just did not feel like it while I was climbing in and out or should that be squeezing through.  I was shall we say a little big for the space not at all how I remembered it all those years ago. Strangely I could still lie flat out on the cabin tank top so could have slept in the cabin, but I would not suggest that it would have been comfortable.

As the space on either side of the forward part of the plate case was to become the anchor and pump lockers various support beams were glued and screwed into place. To these would soon be attached various panels with the ones on top easily removable for easy access to the anchor when needed. The whole was also designed so that any water in this area would drain back down the centreboard slot.

I was by now feeling pretty chuffed with myself, you could almost feel the boat riding the waves. I keep coming back to the satisfaction I got from rebuilding Alella, both from the memories that it bought back but also the achievement of creating an object of beauty in its own right by my own hands.


When I had taken the boat apart I had noticed that the aluminium pintels were severely corroded but the old rudder stock was still in good condition. However despite significant research on the web, I could not source pintels with a 9mm pin and hole. Was I looking in the wrong places? All I could find were 6mm ones which I am sure would have been strong enough but I would have had to make a new rudder stock. Thus the “best pintels in the world” were born. These were machined out of solid stainless steel and if they ever corrode I will eat my hat. These were machined by engineers AF Sanders in Wolverhampton. Thanks Carl and Tony your help was greatly appreciated. (Web address: http://www.afsanders.co.uk )

Alella -The cockpit takes shape

Enough of admiring progress so far, there was much work to do and Christmas was fast approaching. I still had the cabin tank, deck, cockpit, gunwales, hatches, varnishing……to finish. How did I ever think this could be be done in a few weeks? My farther had primitive tools mainly of the hand variety, I think a Wolf electric hand drill was his most advanced item. Yet still he built the boat seemingly in less time than it was taking me working long weekends and most evenings even with a workshop full of power tools, to use the current vernacular “much respect” dad.

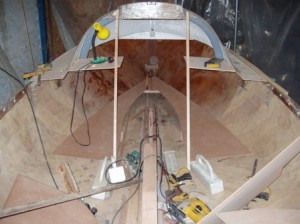
So the cabin tank blanks were cut out, small support ribs made and the tank side support carlins glued on before epoxying the assembly into the boat.


The tanks sides were cut out and fitted using clamps, screws and wedges to ensure that everything was as required.


The main bulkheads that form the rear of the cabin had already been cut out as had the half bulkheads for the side tanks. These were now be fitted and glued in place.


The seat carlins were cut to size and the main deck inner support carlin was laminated ready for fitting. This took some fitting as due to the deck panel shapes at the stern it was going to need an awful lot of twist. By using some of my longest clamps I was able to get the leverage to achieve the required twist and glue the deck beams in place. Additional strength fillets were used to ensure the structure was strong enough.

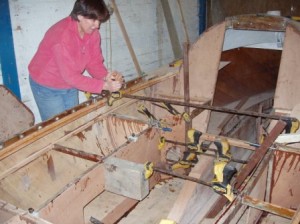
Again numerous clamps, blocks and wedges were employed to ensure that the whole structure was accurately glued together. Once the main tank side structure was in place epoxy fillets were applied and just to be sure a couple of layers of glass cloth were applied to the joints. I think it will be strong enough for a long life.


It was then a simple but not necessarily short process of building the interior by fitting the ply panels to the framework and gluing it all together.  Once almost ready it had to be tested and “Peggies Perch” checked for comfort, it seemed to pass the test.

Alella is now really starting to look like a boat again with seats and decks.

Alella – rear deck frame

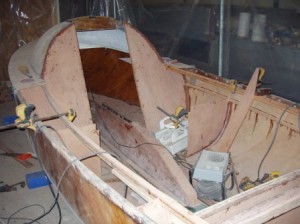
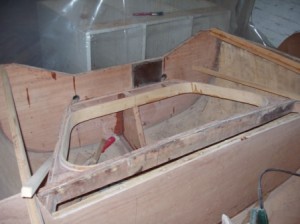
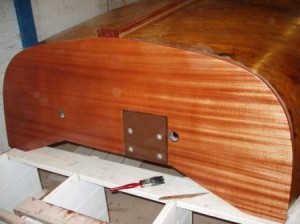
In retrospect at this point in the rebuild I think that I was getting cocky as the design of the rear deck and hatch frame combined aesthetic as well as functional properties. Two years later I still like the curves and shapes so am pleased that I spent the time getting this right. The reaction of my family was that it was “Just like a Merlin Rocket” at the back. After sailing Merlin’s for many years the similarity must have come from my subconscious mind which was no bad thing as Merlin’s always look great to my mind. This shows the stern of the boat after it had been decked

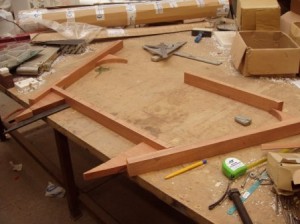
The design brief was simple build a support for the rear deck that had a hatch through which the outboard motor could be stored. It also had to be strong enough to walk on. As I wanted the outboard to fit directly onto the transom I had lowered the rear edge of the deck to create an outboard well. This dictated that rear deck either stepped up or sloped up to the rear bulkhead, I chose the latter. The original hatch had been square but I thought that it would look better with rounded corners which could be laminated using agba veneer.

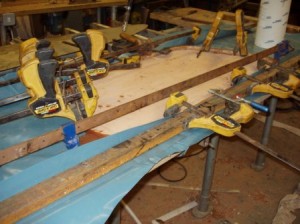
The new frame was built using the original rear cross beam incorporated into it. This involved a lot of complex angles to get the construction just right. Rebates were routered where necessary to create lands for the deck panels to glue onto. The hatch lip was laminated using strips of agba veneer. I made up plastic clamping blocks that fitted the radius of the corners which allowed the veneer to be clamped tightly when gluing up the laminate. This job was one of many where I used virtually every clamp I had to ensure that the integrity of the assembly was achieved. As it is possible to stand on the hatch lip without a problem it can be said that this was achieved.

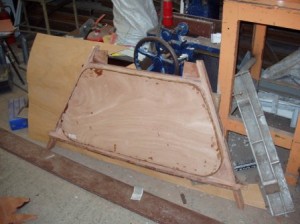
The rear hatch cover was then laminated using a similar method to build a lip around the plywood cover. In this case we could staple the laminates around the cover as well as use clamps. To finish it off a strengthening web was glued onto the inside and the whole edge routered with a quarter round bit to give a rolled edge to the cover.


Once the two sub assemblies were completed the moment of truth came would they fit each other…….


To support the frame a rear bearer and knee were glued into the hull. The original transom may have fallen out but this one will need to take half the boat with it and should ensure that the rear is really stiff.


All that remained was to glue the new frame into the stern of the boat and this part of the build would be ready for decking. I must admit that I stood back and admired it quite a lot. As the boat was coming back together this was a recurring problem as the nostalgia from seeing the boat come back to life kicked in.

Alella – First Varnish

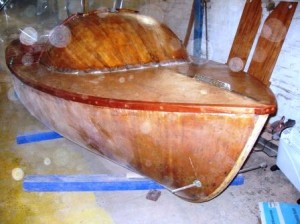
With the cabin and foredeck refitted it was nearly time to turn the boat over to fibreglass the inside of the cabin and epoxy coat and varnish the outside of the hull.

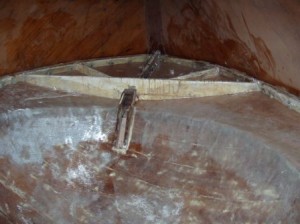
To stiffen the hull I fitted the rear bulkhead. This was marked out carefully then cut out by jigsaw. Once it was near to shape it was possible to very accurately mark the shape using a spacer along the lines of a jigger stick (is that the right term?). Whatever it worked and the bulkhead sat snugly in place. It only remained to glue and fillet both sides with epoxy resin and fillers.

The hull was now rolled over using old mattresses to protect the hull. It was really easy especially when you have the strength of several lads from the next door fabricators Steel Framed Structures (http://www.steelframestructuresltd.co.uk/) who made light work of boat movements like this – thanks Steve, Mick, Phil and the lads. In between helping me they also did some pretty impressive steel fabrications.

With the hull upside down it was easy to fibreglass the inside of the cabin and foredeck. A thin glass layer on most surfaces but triple 200g cloth to strengthen the foredeck to cabin joint. This was done as multiple overlapping strips that also got the fibres running across the joint. The fibre-glassing was being done as a trade off between weight and the longevity of the boat as it should protect and strengthen parts of the original boat that had really suffered over its previous use.

The next task was to sand the outside of the hull to ensure it was really smooth. All the drips and runs from the repair works were removed and the boat started to look good. As time had been passing it was now getting much cooler so a tent had to be built to keep the boat warm while it was varnished. It was quite cosy inside the tent and the serious business of protecting the hull began.


First three coats of epoxy resin were applied using foam rollers this gave a really sound hard base for the 2 pack polyurethane varnish that was to follow. First I had to give the boat a light wet and dry sanding to remove the bloom from the resin coat. Alella was already starting to look stunning. This gave me hope that she would be finished on time but the plan was very tight especially as the temperatures had dropped which slowed things up a bit.

At long last the results of my efforts were showing results, I just stood back and admired how beautiful the boat looked, she had really scrubbed up well. The new transom looked really good with the wood grain standing out brilliantly. I have to admit that a glass or two of Rioja was taken to celebrate this milestone in the rebuild.

Alella – A Brief introduction

Alella has been associated with Turkhead since the early 60’s. She was built in 1962 by Gordon Townend who used a Fairey Marine Falcon hot moulded hull and built the interior and its distinctive wooden cuddy on the drive whilst three wild youngsters (my brothers and I) got upto various mischief.

At this time our family had started to holiday in West Cork and Alella was taken over on the Innisfallen ferry as she was ideally suited to sailing around the Carbery’s Isles. We sailed around the islands on her in the days before ribs and high powered speedboats. Alella proved to be a very safe and ideal sailing boat for the fantastic sailing area that is Roaring Water Bay. After nearly 50 years and not enough maintenance she was in a sorry state. Not sailed since the start of the new millennium she was lying in a barn quietly gathering dust.

Then on a fine July day in 2009 we took the punt out to Middle Calf, a really beautiful island. On the way we stopped to see the seals off the Tourane rocks. This idyllic day was spoilt for me by the noise and vibration of the outboard. Memories of quietly sailing around the islands in peace and harmony with the surroundings flooded back for me.

When I got back to Turkhead that evening I slipped out to the barn to see Alella under her cover. She was in a rather sorry state. However a “Baldrick” type plan was forming to rebuild her, but was it sensible?


Alella leaving barn for rebuild


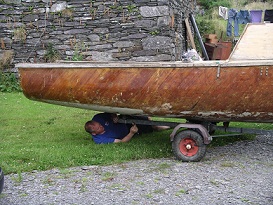
So after dragging an old trailer out of the brambles and getting the local engineers in Skibbereen to fit new bearings there was half a chance that we could get the boat back to the UK for a refit. The boat was loaded onto the trailer and readied for her return. My mother took many photographs perhaps thinking that this was the last she would see of the boat.


Ready to return to UK

After an uneventful drive back to the Midlands, Alella awaited the start of her rebuild. At this stage none of us knew what was in store. Over the next few weeks I will record the story of how Alella was rebuilt and came to sail around the islands in West Cork again.